
Podcast: Play in new window | Download (Duration: 14:10 — 7.1MB) | Embed
Welcome to Stuff I Learned Yesterday. My name is Darrell Darnell, for the first time in my life I hired someone to help with my lawn care this year, and I believe if you are learning, you aren’t living. In today’s episode of Stuff I Learned Yesterday I share a story that helped me learn the value in looking at things from a different perspective.
Today’s Fun Fact: Since today’s episode will be featuring a story about my car, here are some facts about the Toyota Celica.
- The Toyota Celica was made from 1971-2006
- There were 7 generations of the car
- The Toyota Supra and Toyota Camry both began as optional models of the Toyota Celica
- The Toyota Celica has a deep history of success in the World Rally Championship with its first victory coming in the 1982 Rally of New Zealand
- My favorite generation is the third generation made from 1981-1985, with my second favorite being the first generation which was made from 1971-1977.
What I Learned Yesterday:
In June of 1984 a brown topaz colored Toyota Celica GT rolled off an assembly line in Japan. It was the 54,269th Celica made that year, and it now sits in my garage. From Japan it traveled by boat to the United States, eventually taking it to a Toyota dealer in California. The dealership manager liked the car so much he purchased it and added it to his personal collection. He held on to the car for over 15 years, eventually selling it to a man stationed at a nearby Air Force base. That man was eventually transferred to Tinker Air Force base here in Oklahoma City, where he kept the car in his garage protected by a car cover most of the time.
However, space in his garage eventually ran out, and he made the difficult decision to sell the car. So in the summer of 2009 I became the third owner of the car. It still looked nearly brand new and had only 22,000 original miles. She was a thing of beauty!
It should come as no surprise that the car was quickly nicknamed The Time Machine. I’m not sure who referred to it by that name first, but nearly everyone calls it that now. Most everyone loves it. I’ve had people talk to me about it while stopped at red lights, folks have nearly crawled all the way out of a drive thru window to get a better look, they’ve left notes on it as it sat parked, and they’ve even waited by it for nearly an hour waiting for me to return so they could talk with me about it.
If I had purchased the car brand new back in 1985, I doubt I would have chosen the brown topaz color. I would have probably gone with red, white, silver, or black. Those colors are timeless and would have still looked great today, but then again, the brown topaz color really fits the character of the car. The styling of the car inside and outside SCREAMS 1980s, and the brown topaz color adds a whole other layer to that scream that red, black, silver, or white could never do. So I love the color.
Now that I work from home, I only take her out for a spin once or twice a week. Back when I worked at my corporate job, she was my trusted companion for an hour and a half each work day. During that time she rarely gave me trouble. The water pump belt broke one day and I had to tow it to a nearby mechanic to fix. But I pride myself on being able to repair my own car. I’ve replaced the brake master cylinder, rear brake shoes, clutch cylinder, alternator, radiator, and ignition coil. All in all, she’s given me very little trouble.
When I’ve made repairs, each of my kids has asked me why I don’t just sell it and get a new car. Once I break down the simple math of having to make a $300 car payment every month or a $200 repair once a year, they seem to understand.
My car requires three belts in order to function properly. The belt closest to the radiator gives power to the power steering system, the middle belt powers the a/c compressor and water pump, and the innermost belt gives power to the alternator.
Earlier this winter one of the belts began squeaking intermittently. It typically only squeaked for a few seconds after I first started the engine, so I didn’t make fixing it a high priority. However, one day it started squeaking for a longer period of time and I knew that I would have to take a look at it soon.
Well my luck ran out a couple of days later and as the kids and I were on our way to grab some take out, the belt snapped. Not knowing which belt was squeaking, I immediately pulled off the road to assess the situation. If the water pump belt breaks, the car can not be driven or it will immediately overheat and ruin the engine. Fortunately, it was the alternator belt. Since I was only a mile from home, I was able to safely guide the car back to my garage.
Fortunately, I had already had a new belt for all 3 functions. So I made plans to change the broken belt the following weekend. I’d already had experience changing the alternator, so I expected the job to take between 15 and 30 minutes.
When the day arrived to fix the belt, I got out my repair manual and read over the section about changing the belts. Nothing seemed hard or unexpected, so I began the job.
Almost immediately I recognized a problem. Although I had previously replaced the alternator, that job did not require completely removing the belt from the engine bay. For that job, I only needed to loosen the belt, which allowed the alternator to come free while keeping the belt in its general position. For this job, I had to put a new belt around three different spindles. In order to do that, I would have to remove the radiator fan shroud AND the two other belts.
Removing the radiator fan shroud was as simple as removing 2 easily accessible screws. Removing the first belt was almost as easy. I simply had to loosen the belt tensioner which was easily accessible from the top of the engine bay.
However, removing the second belt proved to be much more difficult. No matter how hard I looked, I could not find the tensioner for the belt. Without locating the tensioner, I would have no way of loosening the belt from its spindles. I read through my repair manual again and again and again and again. I looked at all the diagrams available, and I could not find the right bolt. The longer I spent looking, the more frustrated I became. To make matters worse, the mid 30 degree temperature was making my hands incredibly cold.
I finally decided to clean up and go search YouTube for answers. There aren’t a lot of videos for a 1984 Toyota Celica, but often other Toyota models from that era will be repaired in similar ways. After a lot of searching and video watching, I came up with no solid information.
I returned to my car and read through the repair manual again and again and again. Finally I spotted what I thought could be the tensioner bolt! It was off to the side and had a couple of wires keeping me from getting a good angle on the bolt. I tried desperately to get the bolt to turn, but I couldn’t budge it. I reached back into my tool box and grabbed my extra long socket wrench so I could get more leverage. After securing the socket onto the bolt, I positioned my body in a way to use my weight and strength to loosen the bolt.
I strained and pushed but it did not budge. I tried a new angle, but it still did not budge. My frustration is building with every passing minute. I fiddled around with the placement of the wrench a bit more and and gave it all my might. Finally I felt the sweet release of all that built up pressure!
The feeling of sweet release was almost instantly followed by the feeling of my knuckles and fingers smashing up against the engine block and other parts that were bolted to it. I looked down and my cold, throbbing hand and saw chunks of flesh hanging on the edge of my knuckles, and blood was gushing from between one of my fingernails and the cuticle. To add insult to injury, the bolt hadn’t even budged.
“UGH, that’s it!” I exclaimed. I went inside to address my wounds, put all my tools away, and called it a day.
Over the course of the next few days I thought more about where the tensioner bolt could be. The wounds on my hand quickly began to heal, and by the time the next weekend rolled around I was ready to try again. The fact that the temperature was in the 60s made it an even better reason to give it another go.
Before heading out to the garage I once again read through the repair manual. I still could not figure out where I was going wrong. I then went back over to YouTube and searched for more repair videos. This time I found a video for a 1990s model Toyota pickup that showed a belt tensioner that was accessible from the bottom of the car by either removing the oil pan guard or by removing the right front tire.
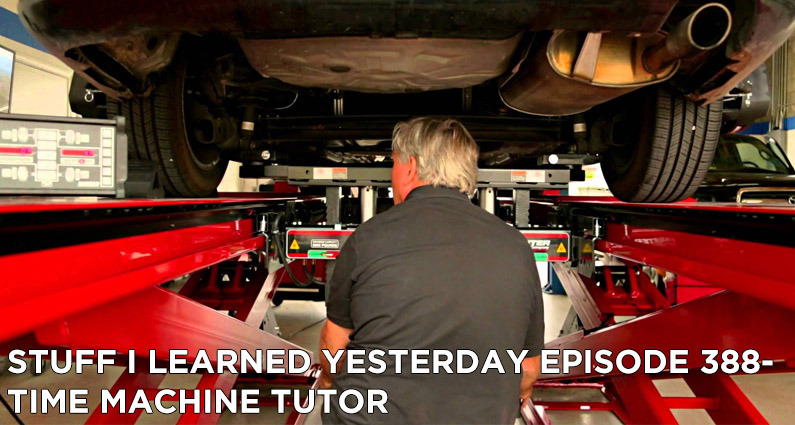
Even though it was a totally different decade, totally different vehicle, and totally different engine, I decided there was no harm in looking to see if that might be where the third belt tensioner was located. I went out to the garage and removed the oil pan guard. I couldn’t believe it! There, plain as day was the elusive belt tensioner!
I picked up the repair manual and compared it to my car. The manual was flat out wrong. No wonder I couldn’t find it.
From there, the job was easy. Within 30 minutes the job was done and all 3 belts had been replaced.
Here’s what I learned.
It pays to look at things from multiple angles. No matter how hard I tried, I could not fix my problem by taking the top down approach. Even though I looked from every conceivable angle and used every resource I had, the proper solution could not be discerned until I crawled underneath the car and looked at it from the bottom up. Once I did that, the solution was instantly revealed and the fix was quickly made.
I learned that I was depending too much on information that others had given me. That repair manual has faithfully guided me through every other repair I’d ever made, but I’d become too dependant on it. I should have thought to crawl underneath the car and look at it from another angle. But the diagram in the book clearly showed the bolt in a different location, so I never allowed myself to properly think creatively about the problem.
It was good that took time to calm down and regain my composure. Only then was I able to head down the path that eventually led to the solution.
And, of course, I learned how to properly change all three belts on the time machine. She’s now purring like a kitten and faithfully taking me all over town. Each time that engine roars to life I’m taken back to 1984 and I’m grateful for all the times my dad made me go out to the garage to help him fix his car, and the lessons I’ve learned underneath the hood.
I’m Darrell Darnell and this has been stuff I learned yesterday.
Send in your contributions for this week’s Friday Forum. Head on over to https://www.goldenspiralmedia.com/feedback and use the form on that page to submit your written or audio message. You can also use the Speakpipe widget to record something using your devices microphone. And of course you can call our voice feedback line at 304-837-2278. We’d love to hear from you.
Join our Facebook Group at Facebook.com/groups/stuffilearnedyesterday.
You can Follow Golden Spiral Media on Twitter at GSMPodcasts and Facebook.com/GoldenSpiralMedia. If you’ve enjoyed this episode of Stuff I Learned Yesterday, I would be grateful if you’d leave a review in iTunes.
[sc:stuff]