
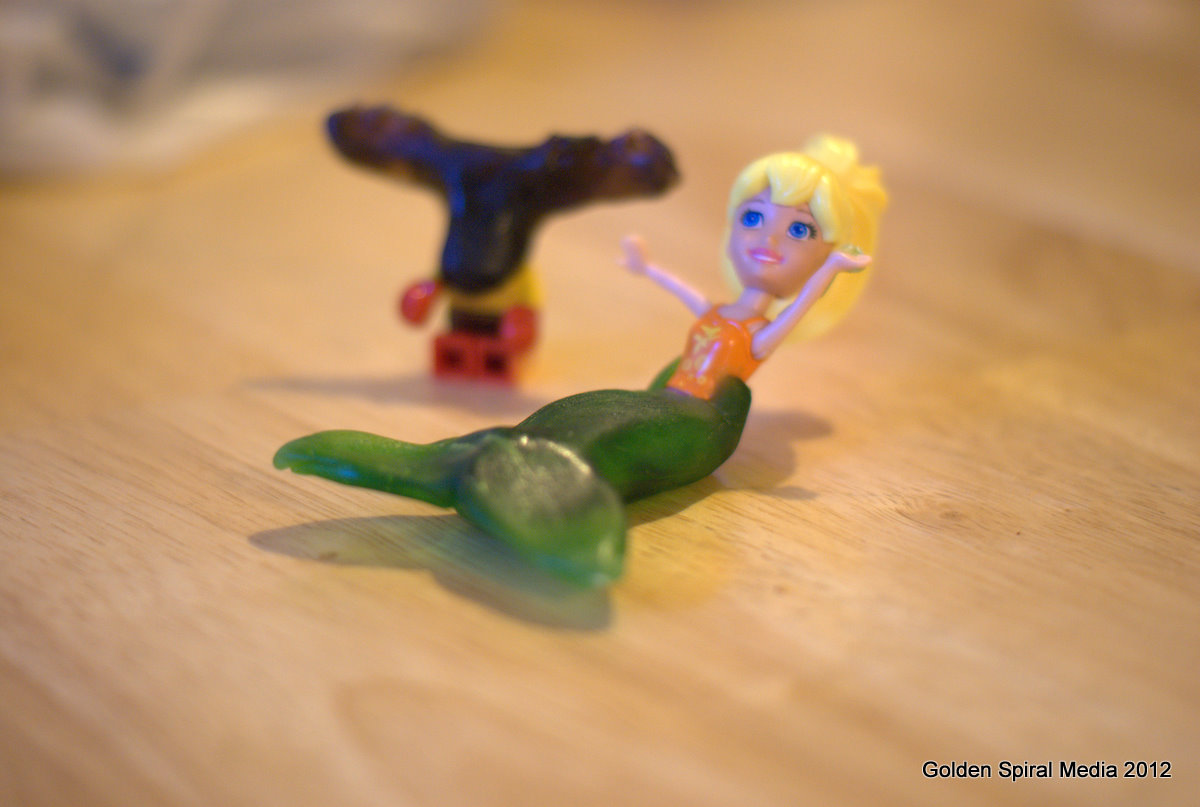
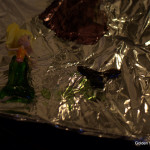
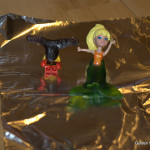
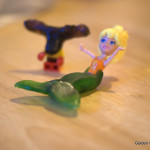
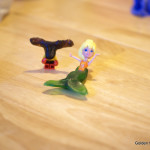
This is a great project to do with your kids. My kids were so excited when I told them we were making “new toys” for them to play with. For this project, we made a mermaid out of a Polly Pocket, and a Moose Head for a Lego Minifig.
Click through to find to how we did it!

Time: 30 mins
Ages: 3 and up
Shopping List:
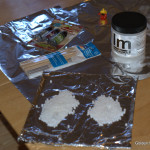
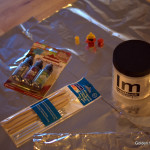
InstaMorph – Moldable Plastic
Alcohol Based Ink (what I used)
Wax Carvers or Clay Molding Tools (optional)
Foil
Latex or disposable gloves
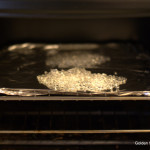
Start by preheating your oven to 180F (about 80C)
There is several ways to do this, but this seems to be safest. You can also use a heat gun or high temp hair dryer, of you can heat water to the right temperature. Just be aware that unless you closely monitor the temperature, it could be a burn hazard.
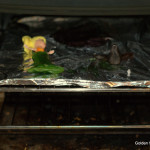
When the oven is hot, place some of the Insta-morph beads on a piece of Foil and place it in the oven. You might place a cookie sheet underneath for structure. How much should you use? A good rule of thumb is to heat up enough to be about double the volume of the item you want to make. Don’t worry about heating up too much; you can always allow it to cool and put it back.

It also helps to do a single layer on the foil. The beads will heat more evenly and will not get as hot.
Allow the Beads to heat until they turn clear. Once they are clear, they will be ready to work.

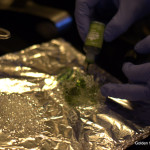
Pull them out of the oven using an oven mitt and touch them with your finger. If the are ready to work (not too hot to touch), add 3-10 drops of the alcohol based ink to the Insta-morph. Being to fold it over on top of itself until the color is evenly mixed. You may want to add more color at this point. Keep in mind that you will still be able to see through the material, but it will dry opaque (not see-through).

After there is no more ink coming off of the Insta-morph, it’s kids time! Have your children help with creating their “new toy.” Ask them to provide input and spend some time understanding what they want.

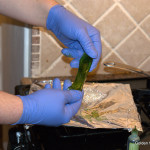
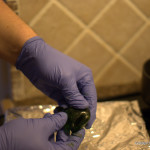
Don’t be afraid to put it back into the oven to improve the workability. We had to do this multiple times. After the toy is formed, use the molding tools to texture and shape the toy. If you don’t have these tools, just use whatever you have on hand. We were able to use a comb and paperclip as tools for textures.
Most of all have fun!
When you and your kid(s) are happy with your creation, let it sit for 15 minutes or put it in the Fridge for 5-10 minutes until it is solid.
That’s it! I hope your kids enjoy it as much as mine did. You can use this for 100’s of things including fixing toys, building electronics docks, molding special hooks, etc. After it is formed, it is sandable and drillable for other projects.

Full gallery is below:


Trackbacks/Pingbacks